Creality Ender 5
I bought a Creality Ender 5 Pro from AnKun (via Amazon) in August 2020 to replace my ageing Solidoodle 2 Pro.
This page is an attempt to collect together what I've found out about the Ender…
Current configuration
Pretty much stock at this point. Most of the commonly-requested upgrades for the Ender 3 and Ender 5 come as standard on the Ender 5 Pro.
- Creality Ender 5 Pro printer – purchased late August 2020
- Creality V1.1.5 silent motherboard with Trinamic TMC motor drivers (preinstalled)
- Capricorn PTFE filament feed tubing (preinstalled)
- Aluminium extruder feeder (preinstalled)
- High-strength (yellow) bed levelling springs (preinstalled)
- Buildtak style build platform (the default)
- Creality PEI print bed upgrade (my 'go-to')
- Use glue sticks or 50% PVA when printing – this protects the bed surface and is especially important when printing PETG.
-
- Very easy to fit. Four screws and a bit of wiring.
- Remember to remove the hot-glue from the controller PCB connectors before trying to unplug them!
- Removing the Z-axis endstop sensor isn't absolutely necessary – and probably not a good idea, given how the cabling is part of another wiring harness.
- Camera mount with Raspberry Pi 4, Pi Camera and Octoprint (see below)
- Redrex dual-gear extruder – BMG-style extruder. Improves filament feed, especially with PETG.
-
- Reduces vibration of the print bed, which increases print quality.
- Don't be tempted to print the backplates and arms at the same time. The backplates can be prone to pulling away from the bed due to their relatively small surface area, which will ruin the print.
- It's best to print the left and right arms, then print the backplates separately.
- Cable management
- Bed cabling strain relief – stops the bed cable from pulling on the print bed solder joints.
- Hotend cable strain reliecf – stops the hotend cable from getting wrapped around the X-motor.
- Cable tie mount for 2020 extrusion – I printed a few of these to hold the cables to the frame.
- Enclosure
- Control panel back cover – protects the wiring on the back of the LCD panel. Print from PETG.
-
- With custom-made extrusion-mount screw-in mounts for the side panels.
- Front hinged door:
- Hinges: https://www.thingiverse.com/thing:2518879 (as seen in this video)
- Handle: https://www.thingiverse.com/thing:3862902 (as seen in this video)
Print beds
Standard flexible print bed

The standard black flexible print bed is similar to “Buildtak”. It is suitable for bed temperatures up to 70C. This is fine for PLA and PETG, but ABS needs higher temperatures.
For PETG, use a thin layer of glue stick as a release agent. The PETG will stick to the glue and pull it off, instead of tearing off pieces of the bed.
Wash with soap and water. Do not use solvents to wash the print bed – acetone and isopropyl will damage it.
The bed comes with a thick, dark-coloured magnetic mount which fits on the metal heated bed surface. This makes it simple to swap beds: peel off the old bed, replace it with a new one, and re-level the bed.
PEI print bed

The PEI bed is a spring-steel sheet with a yellow stick-on PEI coating. It also comes with a self-adhesive magnetic bed surface – the same as the one used with the standard Buildtak-style bed. This makes it easy to change beds.
PEI is resistant to common solvents like acetone, denatured alcohol or isopropyl. I recommend watching Thomas Sanladerer's 5-minute video to learn how to restore and maintain a PEI print bed.
Very 'grippy' filaments like PETG can stick so hard to the bed that they pull off pieces of the bed surface. To avoid this, apply glue stick to the print area before printing. This serves as a release agent for the PETG. It can be washed off with soap and water and the bed left to dry.
To break the printed part away from the bed, flex it. You may have to flex it in several directions. Don't bend it!
If the bed surface is damaged beyond refurbishing (e.g. chunks have broken away) then it can be repaired:
- Use a heatgun to weaken the glue, and scrape off the old PEI sticker. Be careful, the metal sheet will be hot. Wear thick heat-resistant gloves.
- Clean off the glue residue by soaking the metal sheet in acetone. Wipe off with a scrap cloth. Make sure to wear gloves while doing this!
- Lightly sand the metal with a sanding block, wipe clean with a clean cloth dampened in isopropyl or acetone.
- Fit a new 235x235mm PEI sticker.
You might have noticed that it's more practical to simply buy a new PEI bed…
Glass print bed
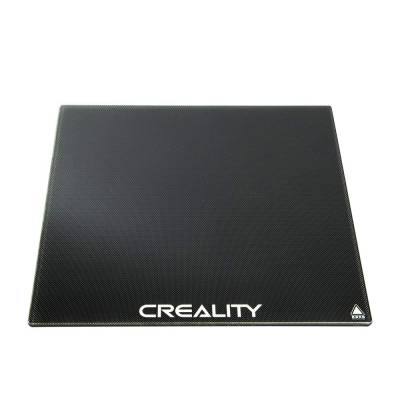
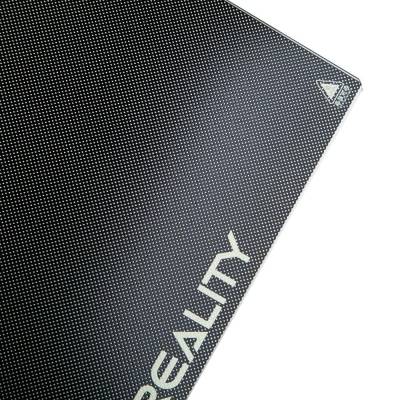
The glass print bed is held onto the metal bed base (remove the plastic or PEI print bed) with four foldback clips. To clean it, use washing-up liquid and hot water. Note that some listings claim that the surface may be cleaned with alcohol – this is not correct. Cleaning with alcohol or acetone will remove the surface from the glass.
The bed should be used with the patterned print surface (with the “Creality” text) facing up. No glue or hairspray is required, but may help if you have bed adhesion issues. Make sure whatever you use is water-soluble for easy clean-up.
If you have the magnetic print bed surface installed (for a PEI or fibreglass/plastic bed) then you should place a piece of thin metal (brass shim or tinfoil) between the magnetic surface and the glass. This prevents the glass from sticking to the magnetic surface. I used a 250x250mm, 0.5mm thick sheet of 304 Stainless Steel from The Multi Metals Shop on eBay (JD Multi Metals of Sheffield) and cut it down to size.
If the glass has already stuck to the magnetic surface, follow the procedure above (for removing the magnetic surface) but insert the scraper between the magnetic surface and the glass. Make sure you have a new magnetic bed to install afterwards.
There's a good thread on glass bed care on the Ender5 Reddit.
Magnetic pad installation and removal (Standard and PEI beds)
The Standard and PEI beds come with a magnetic surface. Replacing this is possible, but is a fairly slow process.
Removing the damaged magnetic surface
- Heat the bed up to 50C. Wait a few minutes for it to heat through.
- Use the scraper to get under a corner. Pry the bed up at that corner and peel it back.
- Repeat for the other corners.
- Turn off the bed heating and leave it to cool.
- Use acetone and a cloth to remove the glue residue from the aluminium bed base.
Installing a new magnetic surface
- Clean the aluminium bed base with isopropyl or acetone to remove any grease or glue residue.
- Peel around 3cm of the backing away from the glue sheet.
- Carefully line the magnetic surface up with the back of the bed. Check the alignment carefully.
- Peel off a little more of the backing, then use a cloth to press the magnetic surface down onto the bed. Move across from left to right.
- Keep peeling off a little more of the backing and sticking it down.
- When the magnetic surface is flat on the metal bed, use a cloth to press it down firmly.
Bed levelling
Bed levelling is easy:
- Set the Z height to 305mm (if it isn't already) – this will move the bed to the bottom of the printer and make the surface easier to install.
- Fit the bed surface.
- Raise the Z height to access to the bed levelling knobs. Set all the adjustment screws so the bed is fully lowered. The screw thread should be visible under the knobs.
- Warm the bed to operating temperature (be careful not to touch it!).
- Use the LCD interface to disable the X/Y steppers.
- For each bed adjustment screw, starting with the front-left:
- Gently move the extruder head above the screw.
- Slip a sheet of 80gsm paper between the nozzle and the bed
- Adjust the screw (using the knob) until the sheet of paper slips between the nozzle and bed, rubbing against both but not being too tight to remove. (a sliding fit)
- This will result in a roughly 0.06mm gap (for ABS/PLA). A business card will give a roughly 0.1mm gap (for PETG).
- It is also possible to use a feeler gauge, which may be more accurate.
- After adjusting the last screw, move back to the first. Repeat the process until no further adjustments are needed.
- Use the LCD interface to re-home the printer.
After adjusting, preheat both the bed and extruder, re-home the printer, and check the bed levelling. Re-adjust if needed.
General notes
- The default retract settings in PrusaSlicer are very optimistic (2mm!).
- To reduce stringing, override this in the Filament settings.
- Start at 5mm, increasing 1mm at a time until the stringing stops.
- 3DBenchy (Benchy) is a good test for stringing.
- With the default settings, fine detail can be lost or become warped.
- This is very obvious on the Benchy's funnel.
- To fix, set the following Cooling settings in the Filament Settings:
- Enable auto cooling – on
- Fan speed – min 0%, max 0%
- Bridge fan speed – 0%
- Slow down if layer print time is below: 25 seconds
- This will slow down printing to allow the part to cool - without using the fan, which can cause layer adhesion issues with some filament materials.
Here are some guides for troubleshooting print quality issues:
These are guides about specific filament types:
- 3D Printing Solutions material guides – Advanced Guides for ABS, ASA, PETG, PLA and others
Filament-specific notes
ABS
According to 3D Printing Solutions' ABS printing guide, the nozzle gap should be around 0.1mm, or around the thickness of a sheet of 80gsm paper folded in half. This nozzle gap also works with PETG.
Adjust the PrusaSlicer bed temperature setting to 110C.
Large ABS parts require a heated build environment or enclosure, or they will warp terribly. Alternatively, print them in smaller sections and glue them back together.
PETG
According to 3D Printing Solutions' PETG printing guide, the nozzle gap should be 0.10mm, or roughly two sheets of 80gsm paper (or a business card).
PETG prints very well onto the PEI bed. Use a thin coating of glue stick to prevent the PETG from sticking too well and damaging the PEI surface.
Maintenance and upgrades
Stripped screw threads (bed screws)
The bed mount is made from aluminium, and the threads are not very deep. This makes it far too easy to break the threads if screws are overtightened. I've broken one…
The easiest way to fix the threads is to use a Volkel 4007 V-coil or similar Helicoil-type thread repair kit. The screws are M4x10 hex-head screws, with a washer between the screw head and the bed mount.
Another option is to install a longer screw, then fit a washer and nut on the underside of the bed. It may be necessary to use a countersink or deburring tool to remove the burrs where the thread was cut.
Lubrication
Creality don't seem to lubricate the Z-axis rails or leadscrew. I applied a layer of Molyslip MLG bearing grease to them. The nearest equivalent in Molyslip's current product range (as of August 2020) is Molyslip Arvina HX2. Other bearing greases will likely also be suitable.
I haven't lubricated the plastic rollers on the X and Y axis rails – I'm trying to find a suitable lubricant for those. They seem to wear down and produce dust during the first few prints, then settle in.
Extruder upgrade
I've had some problems with the default single-gear extruder squashing PETG filament and chewing ABS to dust during retractions. Even at the loosest spring setting, it presses too hard, and the brass gear doesn't grip the filament well. Sadly WoodpeckerCZ's mod didn't improve things.
I tried upgrading to the 3DMan dual-gear red extruder which uses two driven, hobbed gears. These move in sync and grip the filament on both sides. Unfortunately these have design issues (an M3 screw used as a shaft which causes the gear to rock on the bearings, see VoltLog's video). Even after machining a custom shaft, I had problems with the feeder losing grip or squashing PETG filament. This was worst during retracts, when the filament spool slipped back and pulled on the filament. Either the motor would miss steps, or the filament would get chewed up.
I've since upgraded to the Redrex dual-drive extruder which is a huge improvement over both the standard Creality feeder and the 3DMan one. It has a 3:1 reduction drive which increases the torque available and reduces the possibility of missed steps. The Redrex extruder has finally resolved all my filament feed issues with PETG!
Camera mount
I've mounted a Raspberry Pi 4 in a Labists case on the top rail of my printer. This is a great position to record timelapses with OctoPi / Octoprint. Unfortunately the lens isn't quite wide enough to see the whole print bed, but the timelapses are still usable.
The tripod mount model can be downloaded from Thingiverse.
I'm using the Pi Camera version 1, with the OV5647 sensor. This produces images with a maximum size of 2592×1944 pixels (5 megapixels), though I have it set to 720p (1280×720) in OctoPi.
Planned upgrades
This video by The Edge Of Tech shows the bed supports, struts and panel cover.
- New camera bracket (old one won't fit with the enclosure mounted)
Firmware
The Ender 5 Pro apparently has a bootloader installed, and a configuration exists for Marlin. There is a guide on the Ender5 Reddit which explains how to install Marlin or TH3D on the Ender 5 Pro's V1.1.5 Board.
TH3D Unified Firmware is another option for the Ender 5 Pro.
Do-it-neat has produced a guide on installing Marlin 1.1.9 on and Ender 5 – the Ender 5 Pro should be similar, but should have the bootloader already installed on the AVR.
With bed levelling enabled, the ATMega1284 may run out of space. Try turning off the bootscreen to save space.
Creality's firmware source is on this Google Drive (linked from Creality's website) – hex files are available here.
Christopher R. Palmer has made a Unified Diff showing the changes Creality made in the 1.1.6.1 firmware.
I'm not aware of any downloadable copies of the Creality 1.1.6.3 firmware.
Spare parts
It's worth keeping a few spare parts and consumables on hand:
-
- The Ender 5 Pro comes with two sets of fittings and 60cm of tube. A 1.2m kit includes enough tube for two tube replacements.
-
- The Ender 5 Pro is built from 2020 (20x20mm) aluminium extrusions. These T-nuts are essential for installing extras (like a camera mount) on the frame.
-
- Creality include a single cleaning needle and a spare nozzle – you can never have too many on hand.
- The nozzles are standard MK8 type, made from brass.
- The nozzle spanner is much easier to use than the standard (open-ended) Creality one.
- Rechargeable silica gel dessicant and large grip-seal bags – to keep filaments dry.